

4/4/14
330 Engine Assembly II
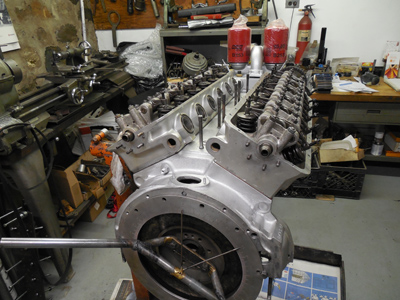
After having to get the crank seal machined earlier in the week, I got
back on track and assembled the bottom end of the 330 motor and
installed the 7/12 head. I started the next day by installing the 1/6
head but first I had to fit the head gasket.

The previous shop installed oversize head studs when they rebuilt this
engine the first time, and after inspecting them we decided they were
fine to reuse. They cut oversize threads into the block and clearanced
the holes in the heads for these studs Returning this back to the stock
size would have been a very expensive exercise for hardly any gain. The
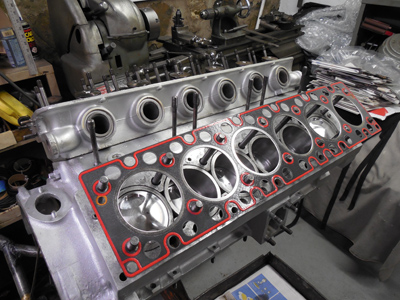
only problem I found was when I went to fit the head gasket onto the
block, the holes in the head gasket were cut for a stock stud, and
these slightly thicker studs were not allowing the head gasket to drop
down over all the studs. The composite head gasket had a steel core so
I had to open some of the holes with a hand file to get the gasket to
fit. Luckily, I didn't have to go past the silicone bead on this gasket
to make things fit. It's little projects like these that add time and
delays to an engine rebuild!
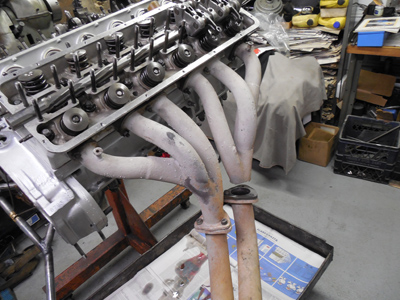
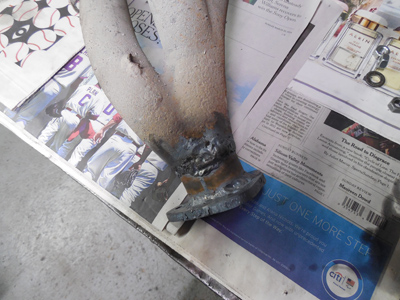
Another voracious consumer of time was fixing the rusted header flange
on the exhaust header. With the 1/6 head mounted on the engine, I was
able to mount the exhaust header so we could weld in a repair.
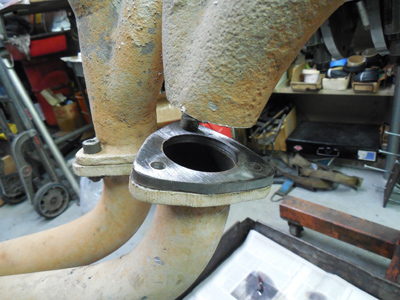
The old flange was pretty trashed, covered in braze and bent from years
of over tightening, I decided to look for a new one. I called my friend
Mike York at Timevalve Exhaust to pull in a favor. Since Mike's
business is fabricating exhaust systems for Ferraris, I knew he must
have had a correct flange already made up for my needs. He popped it in
the mail, and I had it ready for installation. What a time saver!
Thanks Mike!
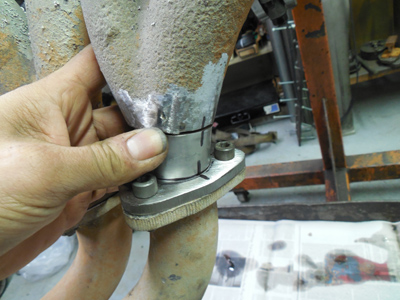
I cut the bad section of header back to where there was good metal and
fabricated a piece of thick tubing to weld in place. Francois tacked
the piece in place and gas welded in the new piece.
With the welding done, I'll clean up the extra weld and get it ready
for the next project. While we were fixing the header, we saw it was
missing one of the threaded stands that hold the heat shield in place.
I'll have to do some more fabricating next week!
We've been on a tear trying to get this engine assembled. While I was
fabricating the pieces for the header, Francois was checking the
camshaft saddle clearances. Francois had to repair some of the previous
work on the valve train, and now that the work was done, he had to make
sure the rocker stands were properly aligned and had good clearance
with his special camshaft reamer. With everything checked and reamed,
we installed the camshaft and rockers.

The next step was to install the timing case and connect the chain to
the camshafts. We made quite a bit of progress this week despite all
the little extra jobs that needed our attention. Next week, we'll check
the cam timing, install the ignition, intakes, and oil pan. She's
coming together nicely!
Save the Date!
The 7th Annual
Radcliffe/Tomyang.net Spring Car Show Saturday May 3rd 2014
celebrating the 50th Anniversary of the Introduction of the 330GT!
Spectators are free, but Registration of show cars are limited for a
small fee. Details can be found on the Radcliffe
Website.
You can also Richard Garre at:
Radcliffe Motorcars
12340 Owings Mills Boulevard
Reisterstown, Maryland 21136
Phone: 410-517-1681

Reminder: If you have a Ferrari
related project, car, or idea
you'd like to explore, I'd love to talk to you. I can also help if
you're thinking of buying or selling. This website represents what I
love to do, and now it's how I make a living, so if you'd like to do
something together, let me know. It all begins with an e-mail!
Previous
Restoration Day
Next
Restoration Day
Home
page