Darren,
#13: 5 5/8"
Cory
330GT 2+2 Bodyshell Rebuild
Re: 330GT 2+2 Bodyshell Rebuild
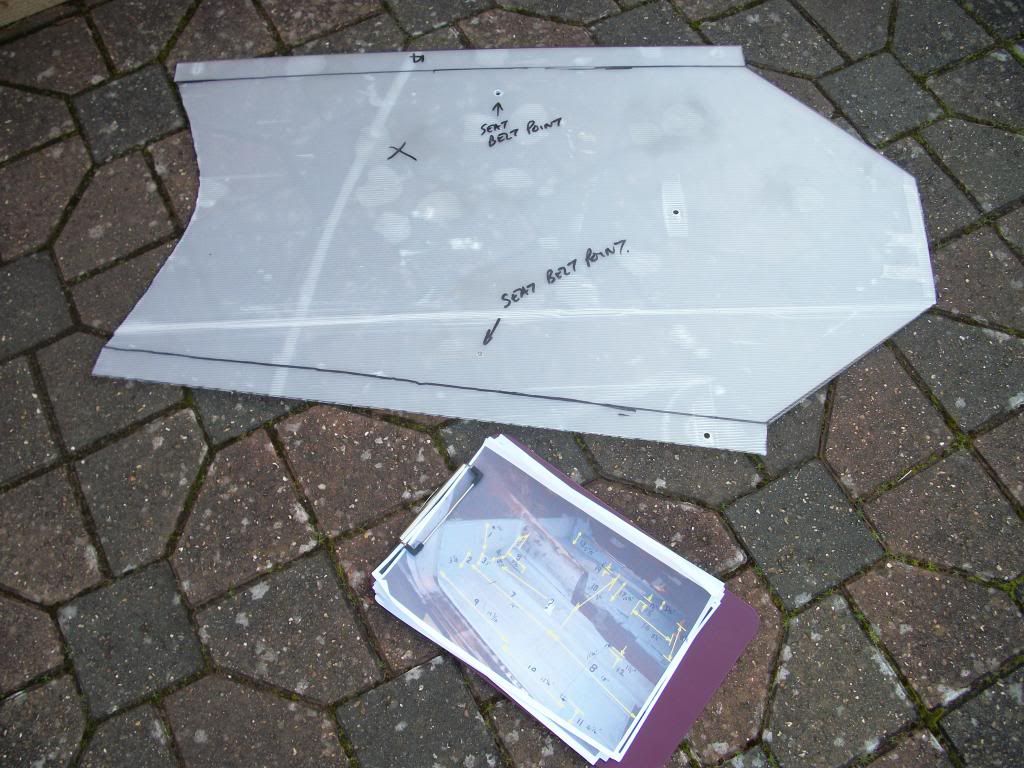
Following the great information and photos from Cory, I was able to make a template for the missing centre tunnel. I’d been working in a warehouse in the dockyard last week and some machinery came in with a thin plastic corrugated packing sheet either side of it. After seeing this go in the bin I asked if I could have it.
This is fantastic for making templates with, as its far more rigid than cardboard and very easy to cut. (I got two 8’x 4’ sheets free. Enough to make all the floor templates I’ll need)
Using Cory’s dimensions and his photos I made a template and trial fitted it several times to get it just right before cutting any metal.
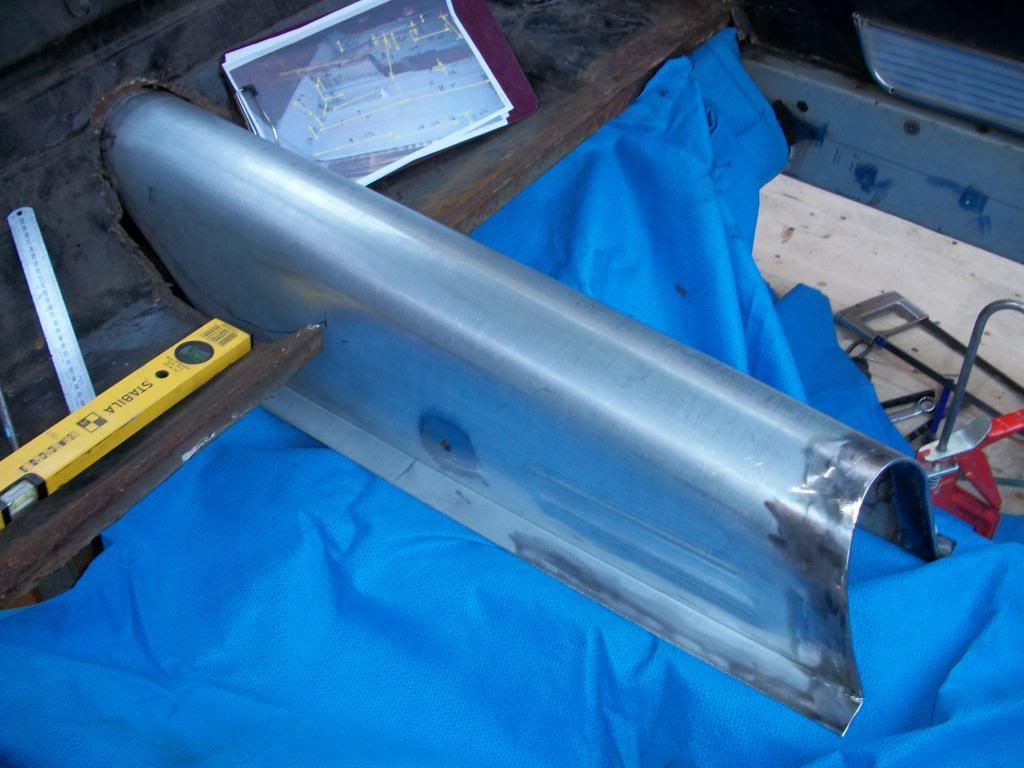
After saving up for a few weeks I had enough for some 16 gauge Zintec sheet for the Tunnel. After a bit of wrestling I got it into the arch shape. Tom Yang kindly sent me an old rear armrest last year and I used this to get the arch radius of the tunnel correct, so that the armrest semi circular base fitted with a 5mm clearance to allow for carpet/soundproofing at a later date. Two flanges were added (temporarily) at the floor level to aid with setting out. These will eventually be cut off when its welded into the car. Next a rummage in my shed turned out two seat belt anchor plates that I’ve had for 30 years, originally purchased for a kit car I built and left over! These were welded in place using the measurements and scale from the pictures. During a lot of searching on the internet I came across a couple of pictures from underneath a 330 which showed a re-enforcing strip at each end of the tunnel. This was copied and welded in. Cory’s photos also showed two parallel “ribs” rolled into the tunnel in front of the seatbelt hole. I have a bead roller that I got off ebay, so these were replicated too.

The new tunnel was offered into the shell and lined up perfectly.
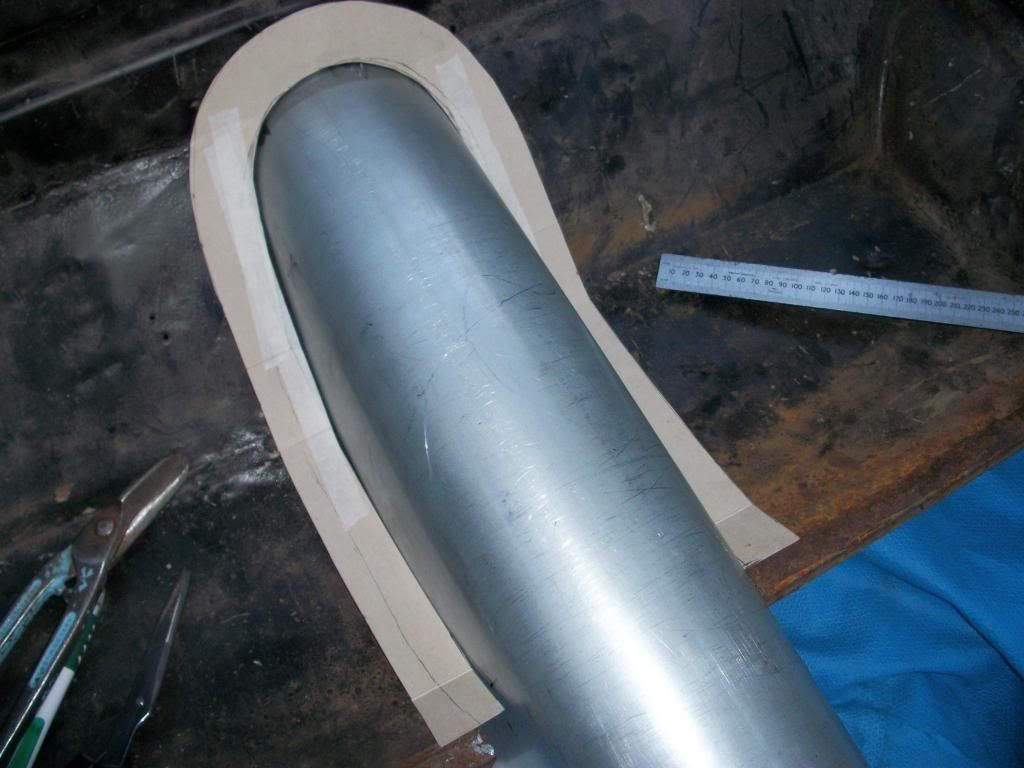
What was clear when the new tunnel was in place, was the complete butchery of the seat base, bulkhead and frame when the old chassis & tunnel was ripped out. This was a bit of a mess with the problem compounded by 50 years of rust. Since this is only localised to the point the tunnel joins the shell I have decided to repair this with a purpose made infill piece. So again with a few hours straightening up the panels around the tunnel I then made a cardboard in-fill template just as I ran out of daylight.

330GT 2+2 4HL 6727
Small things make perfection, but perfection is no small thing.
Small things make perfection, but perfection is no small thing.
Re: 330GT 2+2 Bodyshell Rebuild
whats the ticknes of the metal you use ?
1 mm is absolute wrong ,its part off the anti bodyflex of the chassis.
and is at least 2mm or more if remember right.
best
C.
1 mm is absolute wrong ,its part off the anti bodyflex of the chassis.
and is at least 2mm or more if remember right.
best
C.
Re: 330GT 2+2 Bodyshell Rebuild
C,
It's 16 gauge steel, thats about 1.65mm. As far as I understand, thats what thickness the original is.
Thanks
It's 16 gauge steel, thats about 1.65mm. As far as I understand, thats what thickness the original is.
Thanks
330GT 2+2 4HL 6727
Small things make perfection, but perfection is no small thing.
Small things make perfection, but perfection is no small thing.
Re: 330GT 2+2 Bodyshell Rebuild
Darren,250GT wrote:whats the ticknes of the metal you use ?
1 mm is absolute wrong ,its part off the anti bodyflex of the chassis.
and is at least 2mm or more if remember right.
best
C.
I am sorry to say Cornelius is correct. That tunnel is a minimum of 2mm. Body panels are 19 gauge, .0418" or just over 1mm and you will have to search for 19 gauge as it can be difficult to find sometimes.
Re: 330GT 2+2 Bodyshell Rebuild
Hello Cory,cory wrote:Darren,250GT wrote:whats the ticknes of the metal you use ?
1 mm is absolute wrong ,its part off the anti bodyflex of the chassis.
and is at least 2mm or more if remember right.
best
C.
I am sorry to say Cornelius is correct. That tunnel is a minimum of 2mm. Body panels are 19 gauge, .0418" or just over 1mm and you will have to search for 19 gauge as it can be difficult to find sometimes.
Try to avoid Babylon confusion please.
we are not talking about Bodypanels.
0.418 inch is about 10mm = 1cm
thats clearly to much.
Cornelis (NL)
Cornelius ( German)
thanks
C.(NL)
Re: 330GT 2+2 Bodyshell Rebuild
Darren,250GT wrote:Hello Cory,cory wrote:Darren,250GT wrote:whats the ticknes of the metal you use ?
1 mm is absolute wrong ,its part off the anti bodyflex of the chassis.
and is at least 2mm or more if remember right.
best
C.
I am sorry to say Cornelius is correct. That tunnel is a minimum of 2mm. Body panels are 19 gauge, .0418" or just over 1mm and you will have to search for 19 gauge as it can be difficult to find sometimes.
Try to avoid Babylon confusion please.
we are not talking about Bodypanels.
0.418 inch is about 10mm = 1cm
thats clearly to much.
Cornelis (NL)
Cornelius ( German)
thanks
C.(NL)
First of the piece looks great. The thickness of that piece on my car appears to be made of 10 gauge, .134", or 3.3mm. I didn't mean to confuse anybody with the body panel reference. I mention it to you because 19guage, or ".0418"", is an uncommon product. In your search for parts and materials should you come across a sheet or piece I would snag it for your stash. It will come in handy later for other body repairs and sheet metal work.
Good luck
Cory
Re: 330GT 2+2 Bodyshell Rebuild
Darren,
the only dimension I can give to you are the GILCO( Chassis provider for F-cars) steel thickness he used:
250GT Europa,Boano,Ellena, TDF, PF,Lusso( streetcars) all used the 6mm steel for the oval tubes.
I think 330GT has them too.
250GT SWB and GTO used 5 mm steel tubes!
Thats one of the reasons those cars shows an other behavior in handling weight etc..
C.
- Attachments
-
- PRE 1960 CHASIS
- L1002528.jpg (47.7 KiB) Viewed 9817 times
Re: 330GT 2+2 Bodyshell Rebuild
Thanks Cornelis,
I think we're all getting a little confused here.
The tunnel is NOT the same thickness as the chassis tubes. Its much much thinner, and serves very little purpose in the strength department.
Cory, measure your tunnel again, it can't be 3.3mm? It has a hoop welded into each end (see my picture in a previous post) I'm sure your measuring this. Try measuring it a good 2" back from the end, and let me know what you have.
Kind regards
Darren
330GT 2+2 4HL 6727
Small things make perfection, but perfection is no small thing.
Small things make perfection, but perfection is no small thing.
Re: 330GT 2+2 Bodyshell Rebuild
The "hoop" at each end your mentioning is actually material folded into the "tunnel" for about 2". Putting a caliper on that doubles the measurement I preciously gave you. My caliper can't measure further in beyond that fold. I had to put the car in the air and grab a measurement from underneath and around the driveshaft. The single piece of sheet metal measured .131"
Cory
Cory
Re: 330GT 2+2 Bodyshell Rebuild
Hi Cory,
The "Hoop" is not folded material, it's not part of the tunnel sheet steel itself.
It's a seperate piece of much, much thicker steel that's been welded into the tunnel. That's why your thinking the tunnel steel is much thicker than it actually is.
The "Hoop" is not folded material, it's not part of the tunnel sheet steel itself.
It's a seperate piece of much, much thicker steel that's been welded into the tunnel. That's why your thinking the tunnel steel is much thicker than it actually is.
330GT 2+2 4HL 6727
Small things make perfection, but perfection is no small thing.
Small things make perfection, but perfection is no small thing.
Re: 330GT 2+2 Bodyshell Rebuild
I got sent an email last night.
The tunnel steel in a 330 is 19 gauge which is 0.912mm. That’s why they double up the steel over the seatbelt mounting point to avoid the mounting point pulling through the tunnel itself.
So it looks like my 1.6mm tunnel is actually over engineered after all!
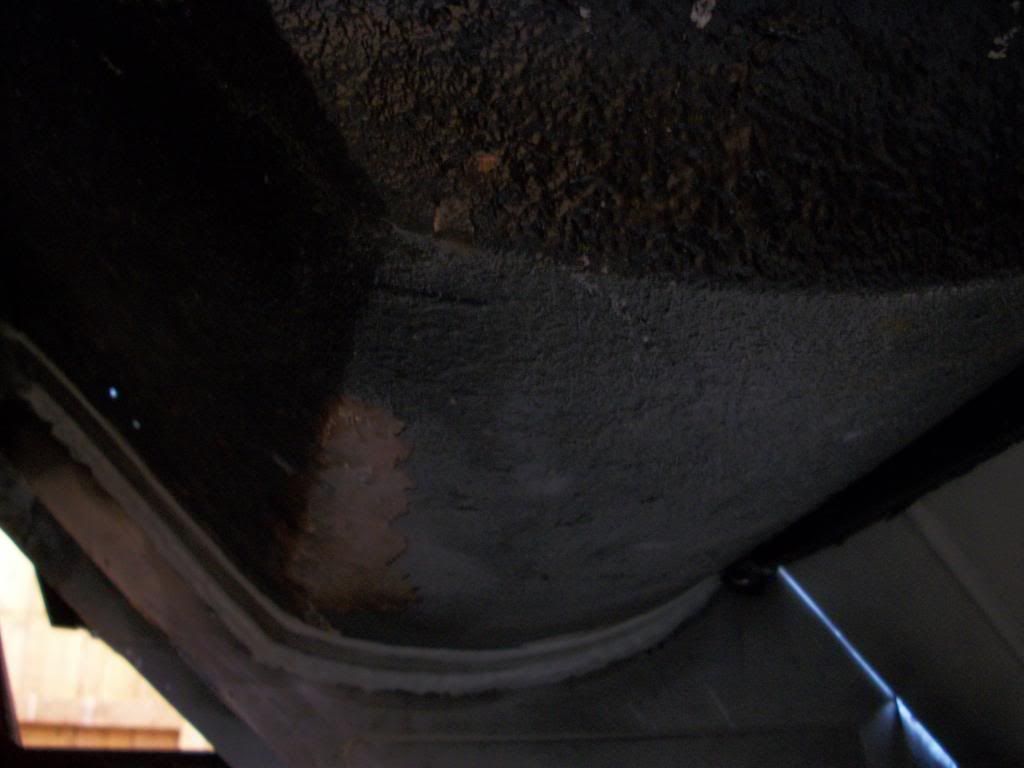
Here’s a copy of the picture that Stephen sent me (he builds 250 California recreations on 330 chassis’s and has several cut up cars)

This explains exactly what I was trying to say about the difficulty in measuring the tunnel whilst it's in the car.
The tunnel steel in a 330 is 19 gauge which is 0.912mm. That’s why they double up the steel over the seatbelt mounting point to avoid the mounting point pulling through the tunnel itself.
So it looks like my 1.6mm tunnel is actually over engineered after all!
Here’s a copy of the picture that Stephen sent me (he builds 250 California recreations on 330 chassis’s and has several cut up cars)

This explains exactly what I was trying to say about the difficulty in measuring the tunnel whilst it's in the car.
330GT 2+2 4HL 6727
Small things make perfection, but perfection is no small thing.
Small things make perfection, but perfection is no small thing.
Re: 330GT 2+2 Bodyshell Rebuild
Darren,
I was actually going to get back to you this morning. I took a measuring pin with a O.D. of .75" and placed it into the tunnel and was able to get a pair of calipers in to take that measurement. Carry on!
Cory
I was actually going to get back to you this morning. I took a measuring pin with a O.D. of .75" and placed it into the tunnel and was able to get a pair of calipers in to take that measurement. Carry on!
Cory
Re: 330GT 2+2 Bodyshell Rebuild
Update,
I finished the new centre tunnel a couple of weeks ago and added a doubler plate over the seatbelt point as per the original. Next I cut a horseshoe shaped section of steel to make up the gap between the seats where the original tunnel had been ripped out of the car. I had to trim back about ½” of the seat and bulkhead to find good metal to weld to since there was a lot of rust and molten metal where the gas axe had been.
Offering the new tunnel up caused a bit of a puzzle. For some reason the tunnel was being pushed over to the right hand side of the car. It appeared as if I needed to cut 1 ½” of seat bottom out of the car to get the tunnel to sit on the dead centreline of the shell?
Now looking through the history of 6727 I know it had a very bad accident in the 1970’s and that the car rolled and had been repaired with a new Left rear quarter panel. There was a lot of hammer beating done to the inner arch on the rear left hand side to get it back into shape.
LH rear inner arch.
What I hadn’t noticed until now was that the impact had been so severe it had pushed the whole of the rear seat base 1 ½” to the Right within the shell! Whoever had put on the new quarter had added a 2” vertical strip of steel inside the wheel arch to make up the difference instead of fixing the car properly.
In the rear seat area just inside your knees when you’re sat in the back, is a box section horizontal steel about 1” x ½”, it was this that had also been pushed over to the right.
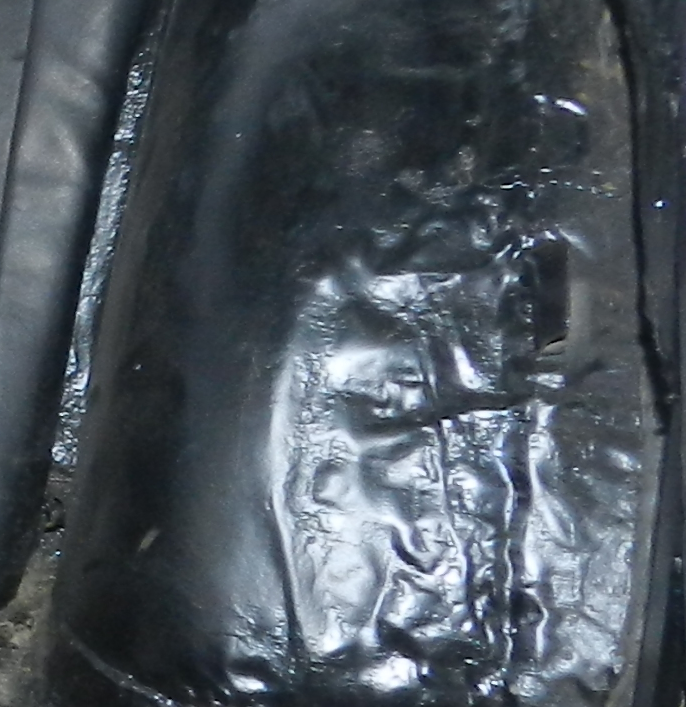
I trawled my pictures of the car that I had from its sale and here’s a close up of it before the tunnel was cut out. This shows the seat base over to the right crushing and deforming the original centre tunnel.
It must have been one heck of an impact to do this.
Centre tunnel damage.

So this was the reason why my new tunnel wouldn’t sit central. I had also heard a rumour that the chassis that was taken from my car was too badly bent to be used in the replica it was intended for and that it was consequently scrapped. No wonder really looking at the distortion, I’d lay bets it must have almost ripped the rear axle out of the car in the accident. The pieces of the puzzle were falling into place.
The only thing to do was to jack the seat base back over to the left. I did this using 4” x 2” and a scissor jack. All in all pushing it back by about 1 ¼”. The tunnel then sat nice and square in the car and was seam welded in place.
Once in I sealed it all with panel sealant. There’s not much I can do with the hammer beat inner arch, but to be true to the cars history, I’ll leave it be, hidden under the upholstery.
Centre tunnel view from underside to seat base.
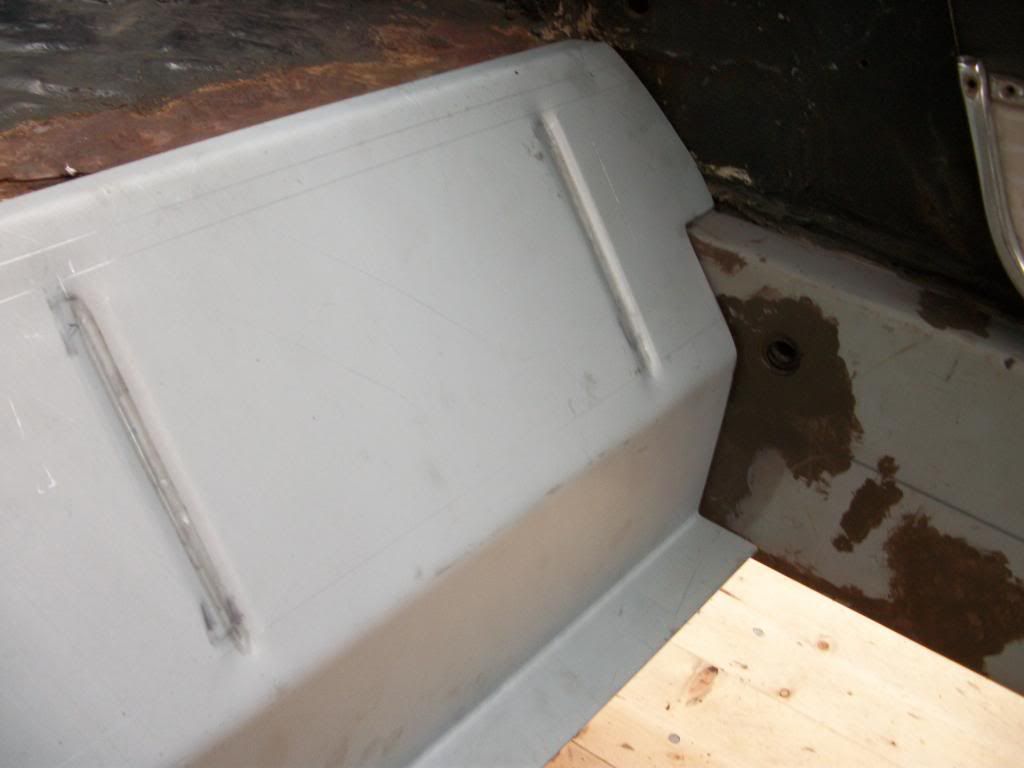
Next using Cory’s very kind photo’s and measurements from his car, I started to make the panels that lead from seat base to floor. Using my bead roller and scaling off Cory’s pictures I put the vertical pressings into the sheet steel. I had to wait for a dry day as my shed isn’t big enough at 8’ x 8’ to have the bead roller inside!
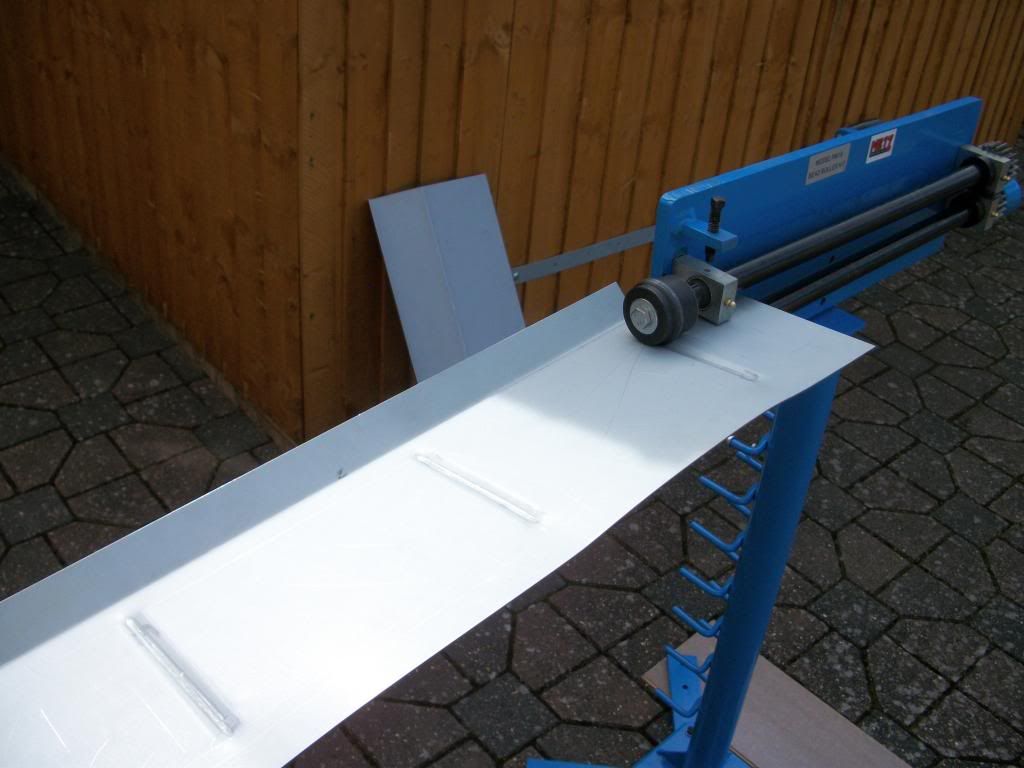
One done then moving onto the next.
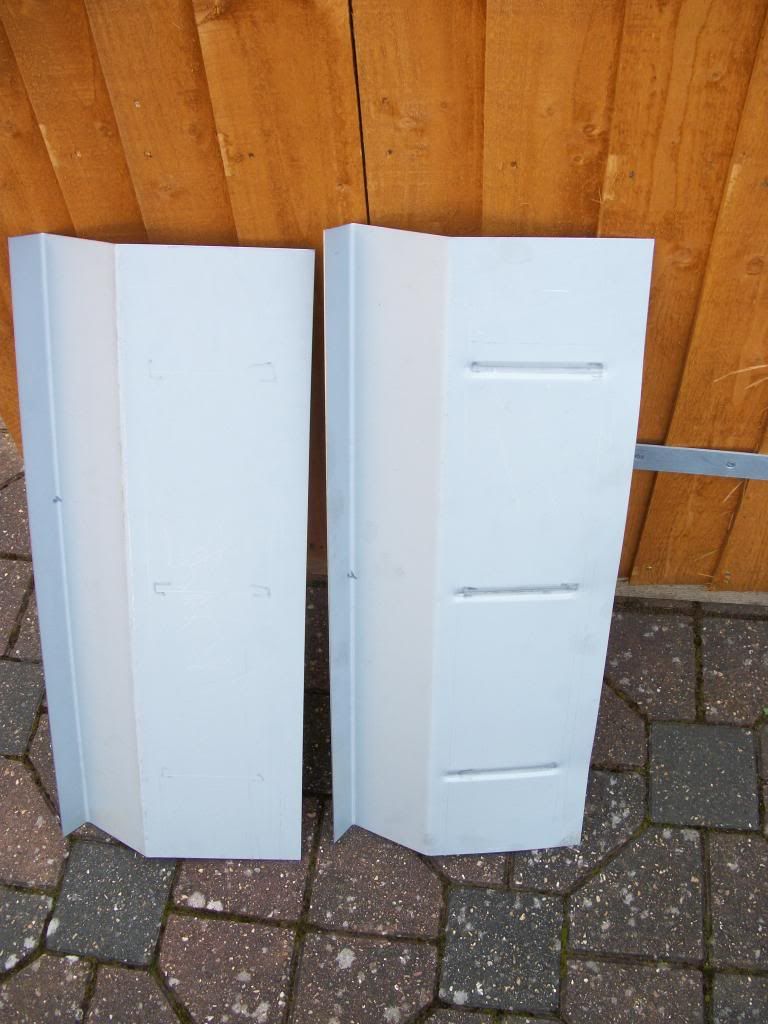
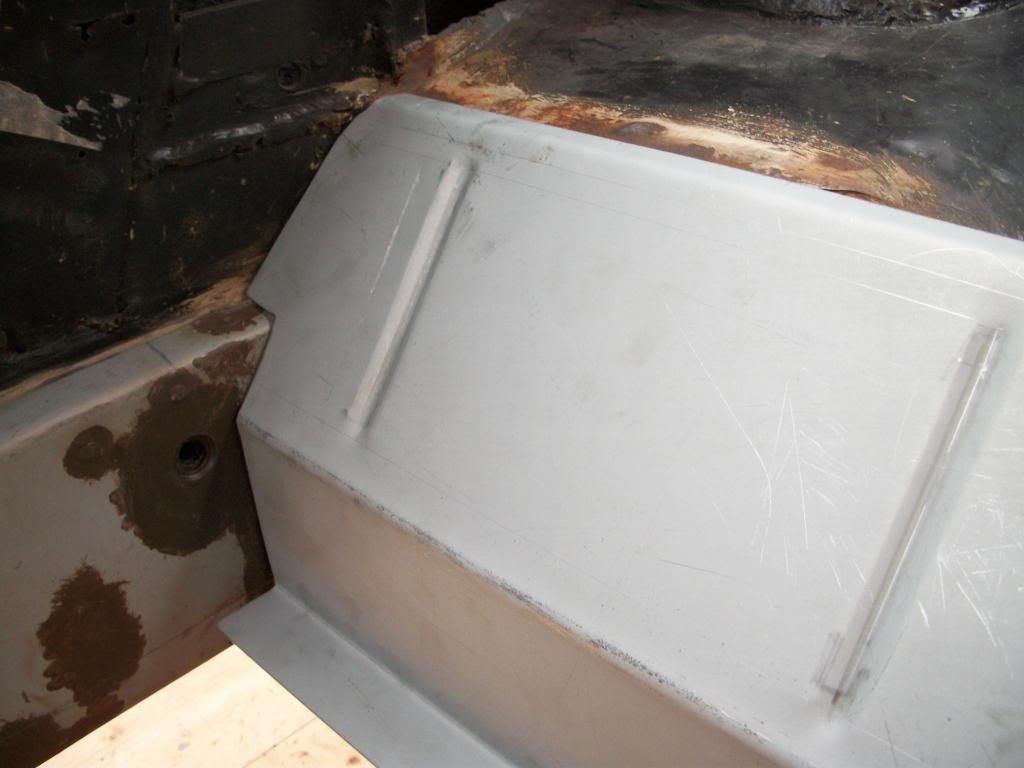
After several hours using old cornflakes boxes I made templates for the ends of each panel to fit the contour of the car. Again a few hours with hacksaw and file and I trial fitted them into the car. There was evidence of the old weld angle on the short panel above the inner sill (rocker) so I replicated this angle when bending the sheet to get a great fit.
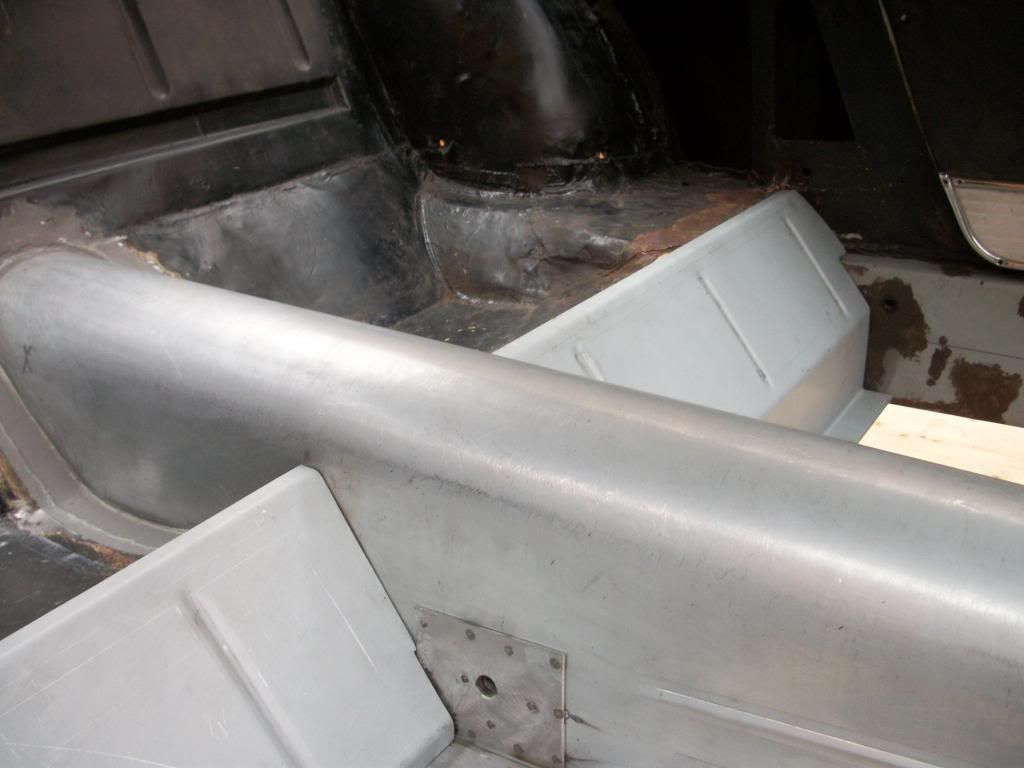
LH end fitted
RH end fitted
They are within 1/8” the same length so I’m happy I’ve finally after 40 years corrected the rear seat distortion in the car.
A little more fettling is required to clear my new chassis tubes that run through the centre of the rear foot wells and the lip on the bottom needs trimming back to hold the lower of the double skinned floor panels.
I finished the new centre tunnel a couple of weeks ago and added a doubler plate over the seatbelt point as per the original. Next I cut a horseshoe shaped section of steel to make up the gap between the seats where the original tunnel had been ripped out of the car. I had to trim back about ½” of the seat and bulkhead to find good metal to weld to since there was a lot of rust and molten metal where the gas axe had been.
Offering the new tunnel up caused a bit of a puzzle. For some reason the tunnel was being pushed over to the right hand side of the car. It appeared as if I needed to cut 1 ½” of seat bottom out of the car to get the tunnel to sit on the dead centreline of the shell?
Now looking through the history of 6727 I know it had a very bad accident in the 1970’s and that the car rolled and had been repaired with a new Left rear quarter panel. There was a lot of hammer beating done to the inner arch on the rear left hand side to get it back into shape.
LH rear inner arch.

What I hadn’t noticed until now was that the impact had been so severe it had pushed the whole of the rear seat base 1 ½” to the Right within the shell! Whoever had put on the new quarter had added a 2” vertical strip of steel inside the wheel arch to make up the difference instead of fixing the car properly.
In the rear seat area just inside your knees when you’re sat in the back, is a box section horizontal steel about 1” x ½”, it was this that had also been pushed over to the right.
I trawled my pictures of the car that I had from its sale and here’s a close up of it before the tunnel was cut out. This shows the seat base over to the right crushing and deforming the original centre tunnel.
It must have been one heck of an impact to do this.
Centre tunnel damage.

So this was the reason why my new tunnel wouldn’t sit central. I had also heard a rumour that the chassis that was taken from my car was too badly bent to be used in the replica it was intended for and that it was consequently scrapped. No wonder really looking at the distortion, I’d lay bets it must have almost ripped the rear axle out of the car in the accident. The pieces of the puzzle were falling into place.
The only thing to do was to jack the seat base back over to the left. I did this using 4” x 2” and a scissor jack. All in all pushing it back by about 1 ¼”. The tunnel then sat nice and square in the car and was seam welded in place.
Once in I sealed it all with panel sealant. There’s not much I can do with the hammer beat inner arch, but to be true to the cars history, I’ll leave it be, hidden under the upholstery.
Centre tunnel view from underside to seat base.

Next using Cory’s very kind photo’s and measurements from his car, I started to make the panels that lead from seat base to floor. Using my bead roller and scaling off Cory’s pictures I put the vertical pressings into the sheet steel. I had to wait for a dry day as my shed isn’t big enough at 8’ x 8’ to have the bead roller inside!

One done then moving onto the next.

After several hours using old cornflakes boxes I made templates for the ends of each panel to fit the contour of the car. Again a few hours with hacksaw and file and I trial fitted them into the car. There was evidence of the old weld angle on the short panel above the inner sill (rocker) so I replicated this angle when bending the sheet to get a great fit.

LH end fitted

RH end fitted

They are within 1/8” the same length so I’m happy I’ve finally after 40 years corrected the rear seat distortion in the car.
A little more fettling is required to clear my new chassis tubes that run through the centre of the rear foot wells and the lip on the bottom needs trimming back to hold the lower of the double skinned floor panels.
330GT 2+2 4HL 6727
Small things make perfection, but perfection is no small thing.
Small things make perfection, but perfection is no small thing.